LVL timber formwork does not have one simple “weight limit” because it is not a single member carrying a single load. On-site, the real question is: can the whole formwork system safely resist wet concrete pressure, construction live loads, and pour dynamics, with enough stiffness to control deflection and enough redundancy to avoid progressive failure?
Below is how that capacity is determined in practice on Australian projects, and what most often reduces it on site.
What Factors Affect the Load Capacity of LVL Timber Formwork?
“Weight” in formwork usually means a combination of forces acting at the same time. The main ones are the weight of wet concrete, temporary loads from people and equipment, and the extra pressure and vibration that happens during a pour.
What does “weight” actually include during a pour?
LVL timber formwork is not just concrete mass sitting still. You are dealing with wet concrete load (vertical), wet concrete pressure—especially on vertical forms—plus live loads like workers, tools, reo bar chairs, screeds, and pump hose handling.
Vibration adds another layer. Internal vibrators and hose movement can spike local loads and increase lateral pressure, which is why failures in LVL timber formwork often happen mid-pour rather than at the start.
Why is LVL formwork capacity a system question, not a beam question?
An LVL member might look like the main support, but capacity depends on the full chain: LVL joists and bearers, props and heads, plywood or HDO facing, fixings, bracing, and load paths into the ground.
If one weak link slips or crushes, the “strong LVL” does not save you. Typical failure points are crushing at bearer edges, prop settlement, nail or screw pull-out at joints, and insufficient bracing that allows racking.
How do moisture, wear, and reuse reduce real capacity?
LVL and formwork plywood are often reused, which is economical, but each cycle can reduce reliability. Water ingress, poor storage, edge damage, face checking, and delamination in plywood all reduce stiffness and connection strength.
LVL can also degrade through swelling at edges, end damage, or repeated fastener holes that elongate and weaken bearing zones. If members are waterlogged, twisted, split at ends, or have crushed bearing areas, downgrade them to lighter-duty use or retire them.
Which site and pour variables increase formwork demand?
Concrete behaviour changes with slump, temperature, and pour rate. Higher slump and faster placement can increase lateral pressure on vertical forms because the concrete behaves more like a fluid for longer.
Vibration can also increase pressure by reducing internal friction temporarily. Common issues during pouring include blowouts from weak ties or joints, bulging from under-bracing, crushing at bearers from concentrated loads, and prop settlement when soleplates are undersized or the ground is soft.
Can LVL formwork reduce costs and environmental impact?
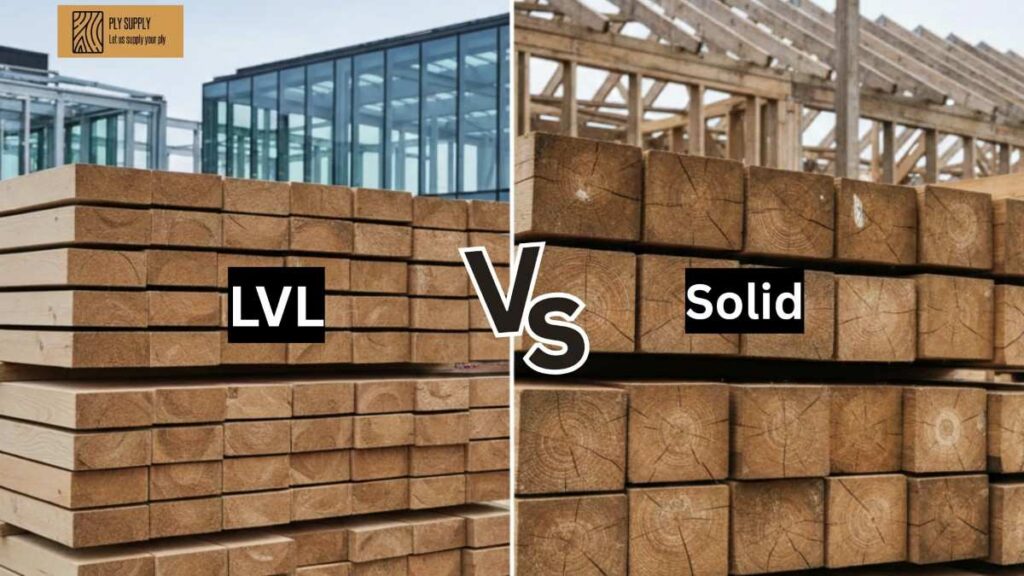
Yes, when it is designed and installed correctly. LVL is engineered for consistent strength and can reduce material waste compared with mixed, variable sawn timber. Better stiffness can mean wider spacing or fewer members in some layouts, which lowers labour and overall “lvl construction” material use.
However, the savings only hold if the system is engineered, maintained, and reused responsibly. One failure, even a minor blowout, can wipe out cost gains through delays, repairs, and wasted concrete.
What LVL Timber Sizes Are Commonly Used for Formwork Support?
Common LVL sizes vary by supplier, stock availability, and the specific formwork system being used. In Australia, always confirm actual section sizes, grades, and span capacities using product literature and project engineering documentation.
Which LVL roles show up most in formwork?
LVL can act as joists (supporting the plywood), bearers (supporting joists), walers (stiffening wall forms), soldiers (vertical strongbacks), and edge beams (supporting slab edges and penetrations).
Bearers and edge beams often see the highest concentrated loads because they collect load from multiple joists and transfer it into props. Walers and soldiers can be critical on vertical forms because they control deflection and distribute lateral pressure into ties and braces.
How should LVL spacing match formwork plywood and HDO facing?
Your LVL spacing should be chosen around the facing performance, not the other way around. If the plywood is too thin for the span, you get face deflection, joint marking, and an uneven soffit even if the LVL itself is “strong enough”.
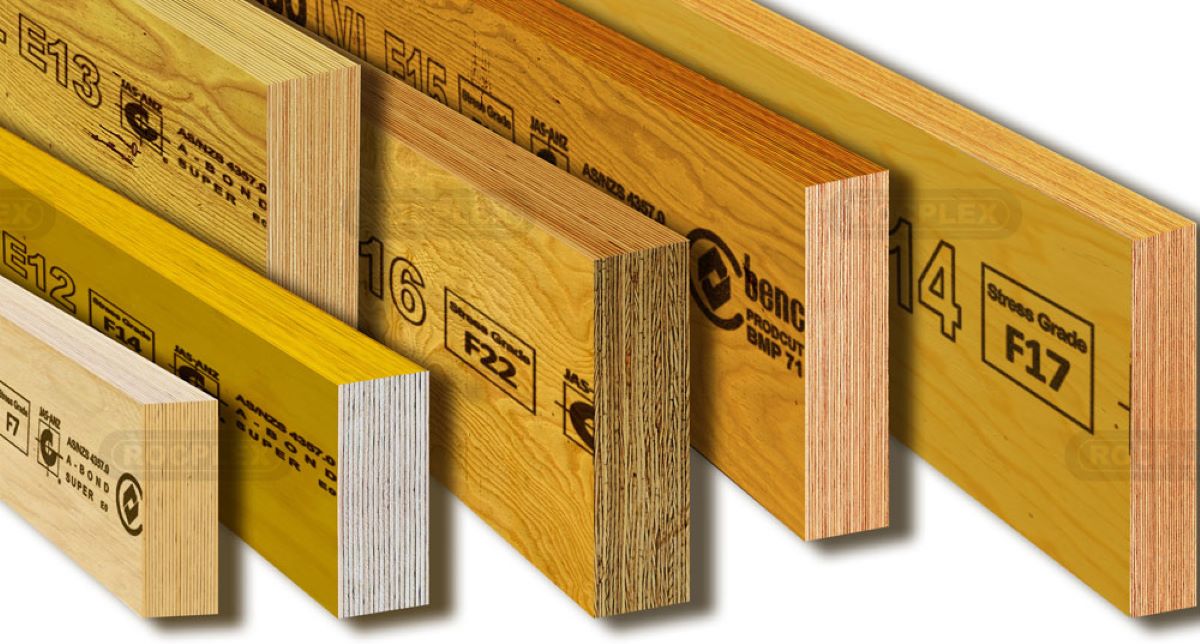
F14 and F17 formwork plywood grades are commonly used. In general terms, F17 is stiffer and better where you need tighter deflection control or higher loads, while F14 can be suitable with closer spacing or lighter duty. HDO-faced plywood is often chosen for repeat use and improved finish consistency.
What should you check when you “lvl timber buy” for formwork?
Start with straightness and edge condition because twist and damaged edges create uneven bearing and local crushing. Look for product stamps, correct grade identification, and exposure rating suitable for site conditions.
Check that ends are clean and not split, and that edge sealing is intact where specified. Supplier QA matters more than most people think. Better procurement and inspection routines, including batch checks on straightness and lamination quality, reduce failures and rework. This is where disciplined buying practices can pay back fast on large pours.
How do size, grade, and supply cycles affect LVL formwork prices?
“Timber LVL formwork prices” move with demand, freight, and wider building material costs. Higher grade or larger sections cost more, but the cheapest option can be the most expensive once you account for extra props, tighter spacing, more labour, and a higher risk of damage.
Also factor reuse. A slightly higher-cost LVL and a durable HDO facing can deliver more cycles if maintained properly, which lowers cost per pour and reduces waste.
How Do Builders Calculate Load Limits for LVL Timber Formwork?
The safe approach is a repeatable workflow. You identify loads, set spans and spacing, check bending, shear, and deflection for LVL and plywood, verify props and bracing, then document and inspect before the pour.
What is the practical workflow used on site?
Most calculations follow the same order:
- Define the pour type and geometry (slab, beam, wall, drop panel).
- Calculate design loads (wet concrete, reo bars, formwork self-weight, live loads).
- Select plywood type and span, then select joist spacing.
- Size bearers and prop spacing based on tributary loads.
- Check connections, bracing, edge details, and load paths to ground.
- Produce drawings, checklists, and an inspection sign-off process.
It is systematic because formwork is temporary, but the consequences of error are permanent.
What is the difference between dead loads and live loads in formwork?
Dead loads include the self-weight of the LVL, plywood/HDO, fixings, and the weight of reinforcement such as reo bars and mesh. Wet concrete is often treated as a dead load during the pour, but it behaves dynamically while being placed.
Live loads include workers, bar chairs being staged, tools, screed rails, and equipment like the pump line. Many site issues come from unplanned live load concentrations; for example stockpiling reo bars or heaping concrete in one area to “catch up”.
How is wet concrete and reinforcement weight accounted for?
Concrete load is usually taken from density-based assumptions, then multiplied by thickness to get a distributed load for slabs and beams. Reinforcement is then added, especially where there is heavy reo bar congestion or additional bars at openings and edges.
Reo matters not only for weight. Proper reo installation and correct bar support reduce the risk of bars being displaced during the pour, which helps the structural performance of the finished concrete and avoids on-site rework that can tempt unsafe formwork changes.
Should capacity be reduced for worn or damaged LVL and plywood?
Yes. Real-world capacity is lower when materials are wet, damaged, or repeatedly reused without maintenance. A quick pre-reuse check is often enough to catch the big risks: swollen plywood edges, delamination, crushed bearing zones, significant twist, splits at ends, and fastener hole damage.
If the facing is marked, soft, or waterlogged, deflection increases and the chance of blowouts at joints rises. Conservatively reducing spans or tightening prop spacing is usually cheaper than dealing with failure.
When is a formwork engineer required, and what should you rely on?
If the formwork is complex, highly loaded, multi-storey, or outside standard tables, you need engineered design and sign-off. Even for simpler work, the safest baseline is manufacturer span tables and project specifications aligned to Australian Standards and codes of practice.
Rules of thumb tend to ignore pour rate, vibration, and material condition. Those are exactly the variables that cause failures.
How does good calculation lower cost without lowering safety?
When loads and spans are calculated properly, you avoid over-ordering LVL, over-propping, and unnecessary labour. That matters more now because building material costs have risen and programme delays are expensive.
Smart design also improves reuse. A system that stays straight, avoids crushing, and strips cleanly gives you more cycles per sheet and member, which lowers total formwork cost over the project.
How Should LVL Timber Formwork Be Installed to Support Concrete Safely?
Correct installation is what turns “paper capacity” into real capacity. Most formwork problems are not because LVL is weak, but because props, bracing, bearings, and pour practices were not controlled.
What should be checked before installation starts?
Confirm you are working to the right drawings and span tables for the pour. Inspect LVL and plywood for swelling, delamination, face damage, and incorrect grade. Verify you have the specified facing, whether F14, F17, or HDO, and that sheets are oriented and supported as intended.
Check that fixings match the system requirements. Substituting screws, nails, or connectors without approval is a common way to reduce capacity without realising it.
How do you get the base and propping right?
Props need firm soleplates on stable ground, set plumb and level, with correct spacing and adequate bracing to prevent kick-out. Settlement is a major hidden risk, especially on soft fill, wet ground, or where soleplates are undersized.
For multi-level pours, backpropping is critical. The slab above might look “hard”, but young concrete can still deflect and overload the LVL and props below if re-shoring rules are ignored.
How should the pour be managed to protect capacity?
Place concrete evenly and avoid heaping. Control pour rate, especially on walls and columns where lateral pressure can spike. Keep the pump hose movement controlled so you do not create local overloads or impact loads at one spot.
Vibration should be effective but not abusive. Over-vibration near form faces and joints can increase pressure and encourage grout loss, which can weaken the interface and lead to bulging or blowouts.
What are common pouring problems and what should you do immediately?
Bulging, squeaking, visible movement, prop rotation, and face cracking are warning signs, not “normal noises”. The immediate action is to stop the pour, reduce loads, and stabilise the system.
Add or tighten bracing, add props where the design allows, and re-check levels and bearings. Restart only once the cause is controlled. Continuing to pour through warning signs is how small issues become sudden failures.
How does maintenance increase reuse and reduce cost?
Clean forms after stripping so concrete build-up does not create uneven bearing and face damage next cycle. De-nail carefully to avoid splitting LVL edges and tearing plywood veneers.
Store LVL and plywood flat, off the ground, and protected from weather and UV. Keeping HDO faces clean and edges sealed can significantly increase reuse cycles, which is often the fastest way to reduce overall formwork cost. Check out more about what is the standard thickness for plywood formwork.
What Safety Precautions Should Be Taken When Using LVL Timber Formwork?
Formwork safety is mostly process discipline. The best material selection cannot compensate for uncontrolled changes, poor supervision, or missing inspections.
What are the non-negotiables before any pour?
Use competent supervision and engineered design where required. Complete a pre-pour inspection and sign-off, and do not modify member sizes, prop spacing, bracing, or fixings without approval.
If something does not match the drawings, treat it as a stop point, not a “we’ll make it work” moment. Formwork failures are fast and unforgiving.
How should exclusion zones and site sequencing be handled?
Keep people out from under suspended decks during the pour and while adjustments are being made. Control access routes so workers are not walking under loaded formwork or in the line of potential blowout areas.
Coordinate sequencing with the pump operator and concreters. Many overloads happen when multiple trades act independently, for example when reo bars are staged in the same bay where the pour is starting.
How can chain and shade mesh improve protection around formwork areas?
Chain and shade mesh can help control dropped objects, wind-blown debris, and site boundary risks, especially on urban projects. Common options include 50% and 90% coverage depending on ventilation, visibility, and containment needs.
For longer programmes, UV-resistant mesh is worth specifying because degraded mesh tears and becomes unreliable. Used correctly, it also helps with noise reduction and improves general site control around active formwork zones.
What should be considered during stripping and post-pour reshoring?
Stripping timing matters. Removing props too early can overload LVL members and the young concrete, especially on spans and around penetrations. Follow the project’s re-shoring and backpropping rules rather than guessing based on surface hardness.
Plan stripping so loads are removed gradually and evenly. Sudden removal of key supports can shift loads into adjacent members that were never designed to take them.
What is the practical “safe-and-cheap” takeaway?
Higher real capacity comes from doing the basics well: select the right LVL and facing, install it to the design with solid propping and bracing, and control the pour rate and placement. That combination prevents failures, reduces waste and downtime, and usually lowers total cost, even when material prices are rising.